I guess I should have reminded you before the day of the eclipse, but I suspect most readers here were well aware of it, and/or unable to see it. Although complete annularity was visible from my home in Santa Fe, I decided to drive an hour south to be close to the centerline. In a total eclipse you want to be close to the centerline to get the longest period of time in totality. In an annular eclipse this is also true, but perhaps the more important consideration is that the Moon passes through the center of the Sun, so the “ring of fire” is symmetrical. Away from the centerline the ring appears more and more lopsided.
My good friend, Bob Yoesle, was visiting here at the time, partly because of the eclipse. Bob is an expert on all things solar, so we were both excited to witness this event. The night before, we were worried that cloud cover would degrade the experience, and we were looking for a better location than the one we had planned, or possibly stay at my home if the clouds looked bad everywhere. But when we got up Saturday morning the forecast had improved quite a bit, so we decided to go with the original plan. It worked out beautifully, with only a few thin clouds during the first half of the eclipse.
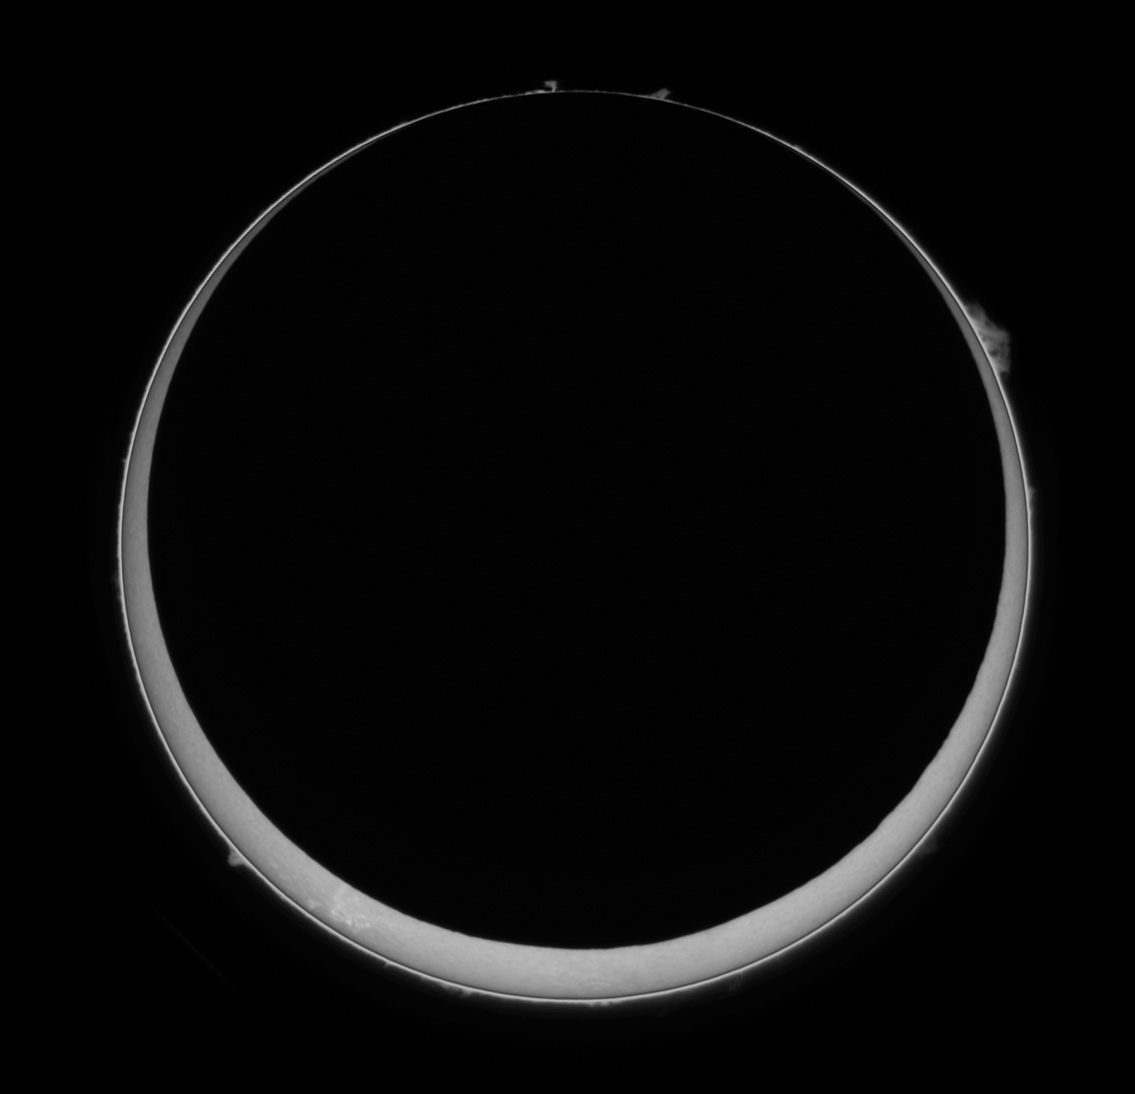
We arrived at the site about 30 minutes before the start of the eclipse, and got our equipment set up just in time. Using a Lunt 60mm H-alpha ‘scope and ASI1600MM camera, I captured a burst of 100 frames every 30 seconds throughout the eclipse. This produced 34,900 frames, consuming 94GB of storage space. The intent in capturing all this data was to produce a time-lapse video of the eclipse, but it will take some time to do all the processing required, including the time it takes to figure out how best to do it. So I decided to extract a single image from one of the most interesting moments of the eclipse. Solar eclipses have 4 “contact” points. The first, called C1, is when the edge of the Moon first “touches” the edge of the Sun. C2 is when the opposite side of the Moon touches the edge of the Sun. This process then reverses to give you C3 and C4. The image here is C2. Visually, the Moon appeared to move down over the Sun, so I rotated the image to correspond to the visual appearance.
Each 100 frame segment (1 segment in this case) is processed to select the 10 best frames, align and stack them, then apply a wavelet filter to sharpen them, and then “stretch” the data to optimize the contrast range. Because the prominences are much dimmer than the surface, they are stretched much more (increased brightness) to make them visible. But this creates a transition region between the two areas that looks somewhat unreal appearance at the boundary.
I’ve decided to buy a second etalon (the filter that lets us see just the h-alpha image) for my ‘scope. Double stacking the filters this way provides much better contrast in the surface details (filaments, etc.) and also makes the prominences relatively brighter, largely eliminating the need for separate stretching. It will likely be a while before I can get the second, but I’m not in a hurry.
There will be a total eclipse passing through Texas next year on April 8th. I don’t know exactly where I’ll be to photograph (and view) the eclipse, but I do have a place to park my trailer, so that’s something.