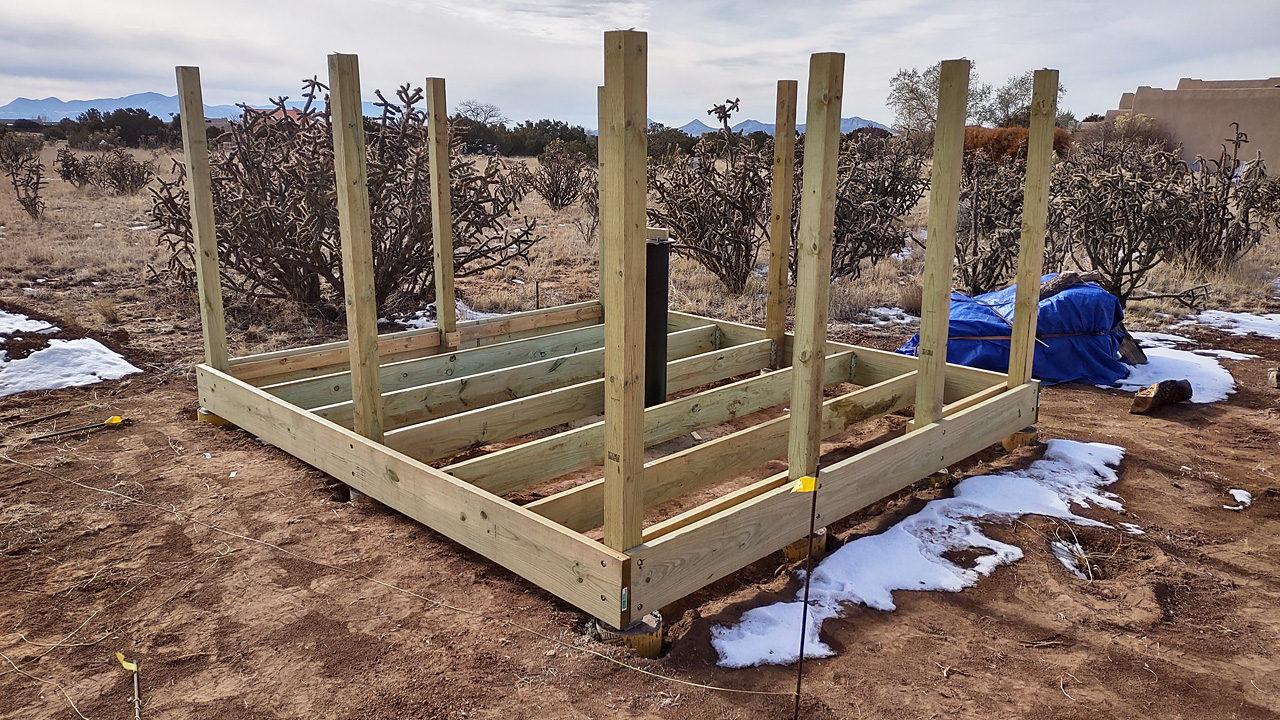
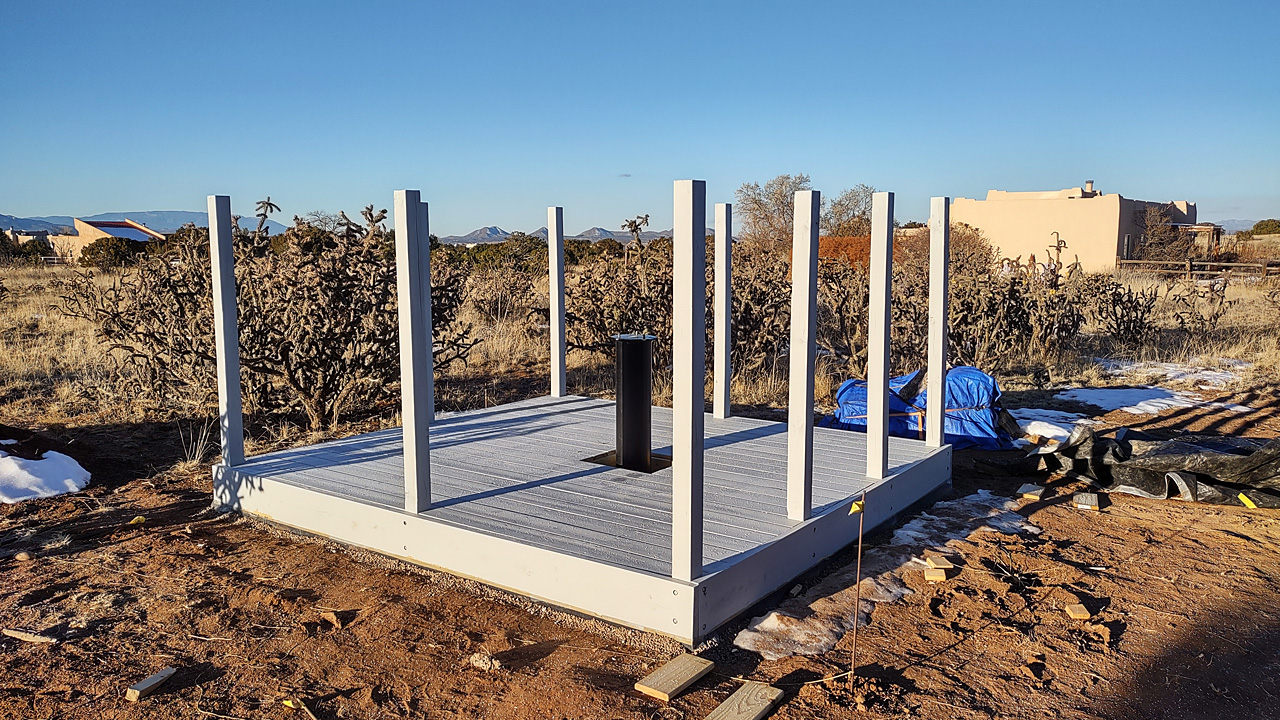
At the end of Part 2a the vertical posts were installed and the skirt boards around the bottom were attached. The next step was to install joists across the (slightly) shorter axis. The skirt boards are 2×10 and the joists are 2×8, with approximately 22 inch spacing. The “shelf” boards at the front and back edges are not as I originally planned. In fact, the front is different from the back. One’s thinking changes as you get into it.
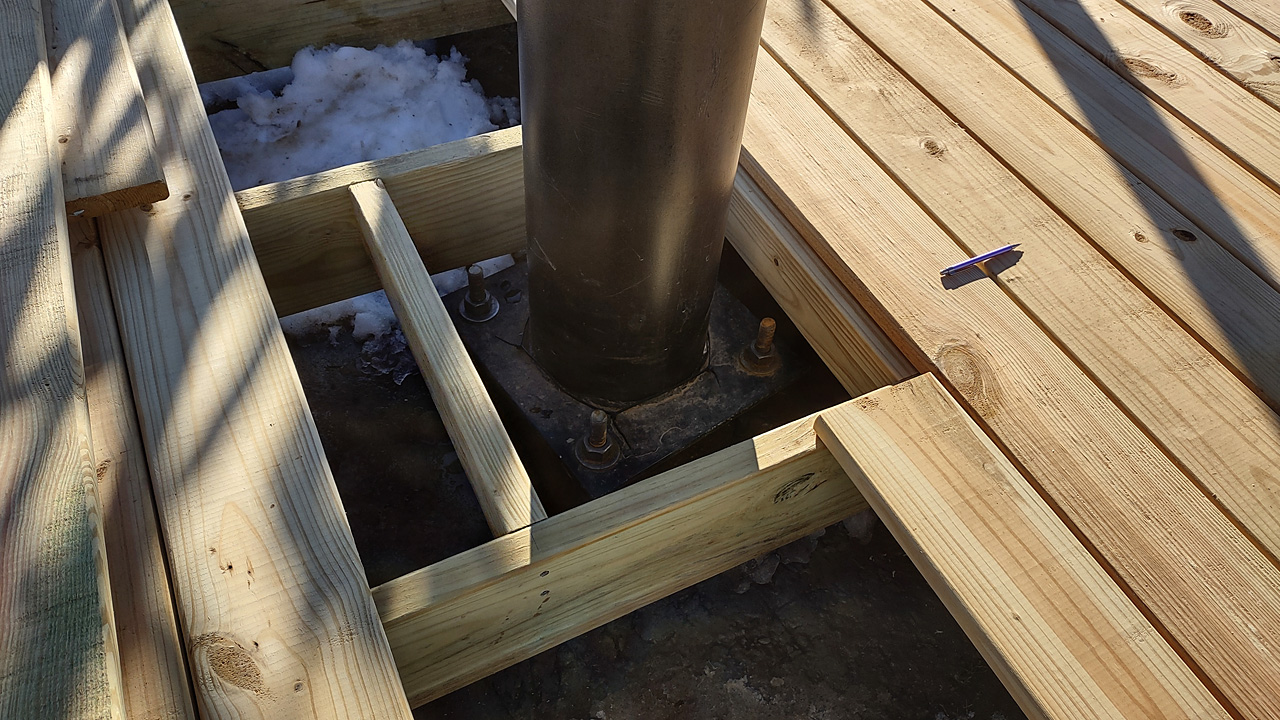
There needs to be some framing around the pier because this section needs to be removable to get access to the base of the pier. The pier just happened to end up almost centered between two joists, and I used the natural spacing of the deck boards to define the size of the opening in the other direction (although I would have preferred a slightly larger dimension here). Everything is cut to have just half the width of a 2 by X supporting the edge. This is a bit crude, but will work for this application. I used 2 x 4s for the cross pieces instead of 2 x 8s to allow a little more room to handle a wrench in this tight space. A wrench would be used to adjust the nuts that determine the height and angle of the pier.
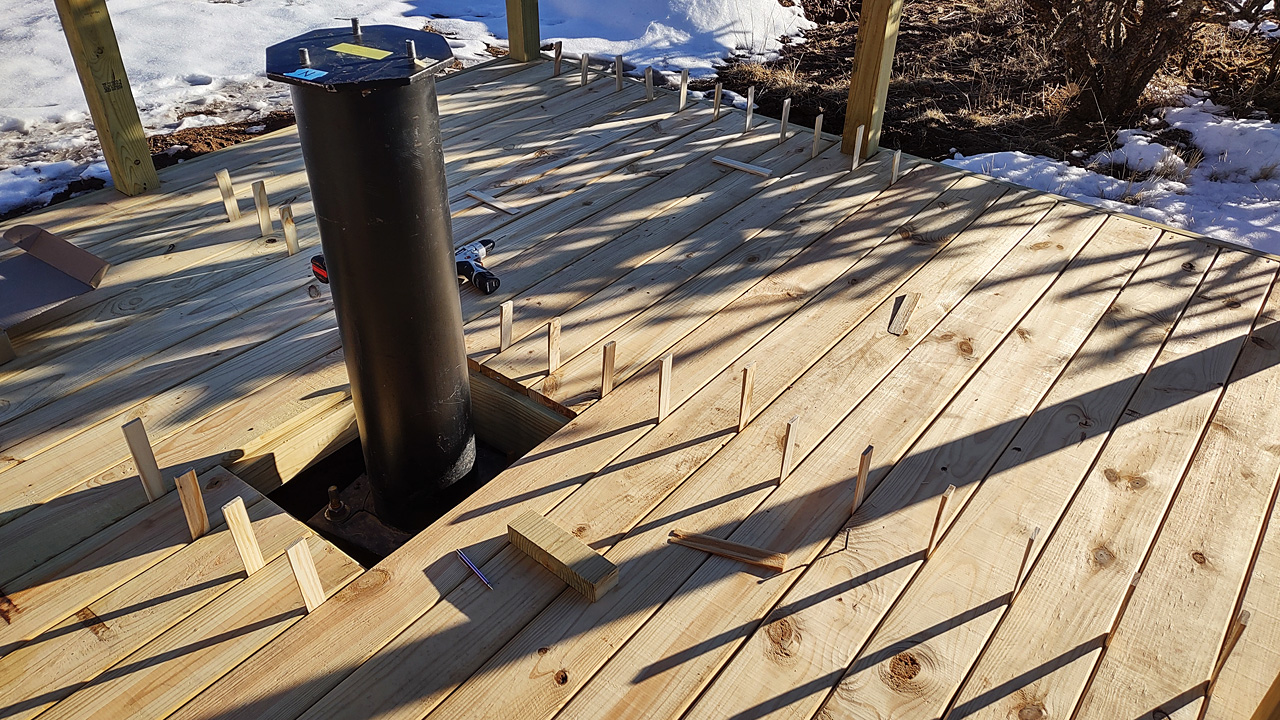
Another thing I hadn’t anticipated was that the deck boards were not precisely milled, so they didn’t line up perfectly, with large spaces in some areas and no gap at all in others. To fix this, I used shims to ensure even spacing as much as possible. This worked pretty well, but not perfectly. The finished deck has one area with too large a gap. It’s about 1/4 inch, which doesn’t seem like much, but it’s enough for a mouse to get through, so I’ll have to do something to close up that area. The deck boards are all attached with screws. That’s a lot of screws.
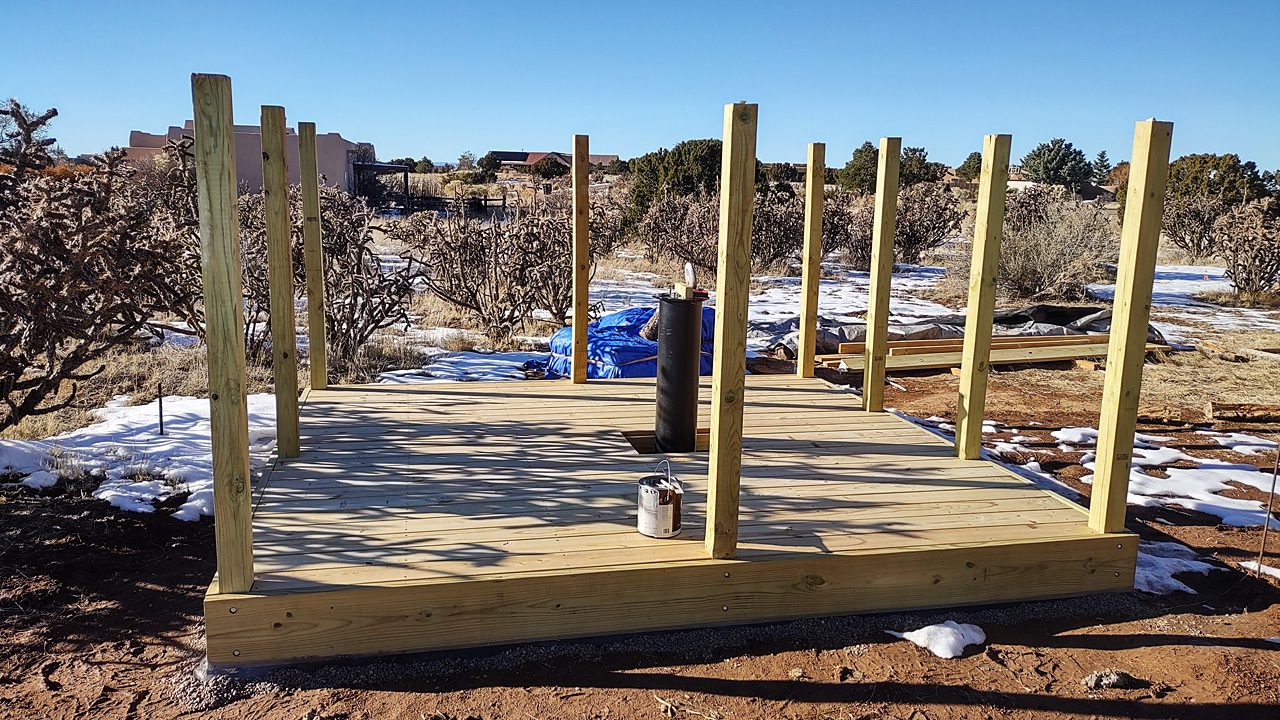
With all the shims removed, the finished deck is ready for painting.
This light gray coat of paint is just to protect the wood from sunshine and rain, so the color doesn’t really matter – none of it will be visible from the outside, and the inside is mostly only seen in the dark!
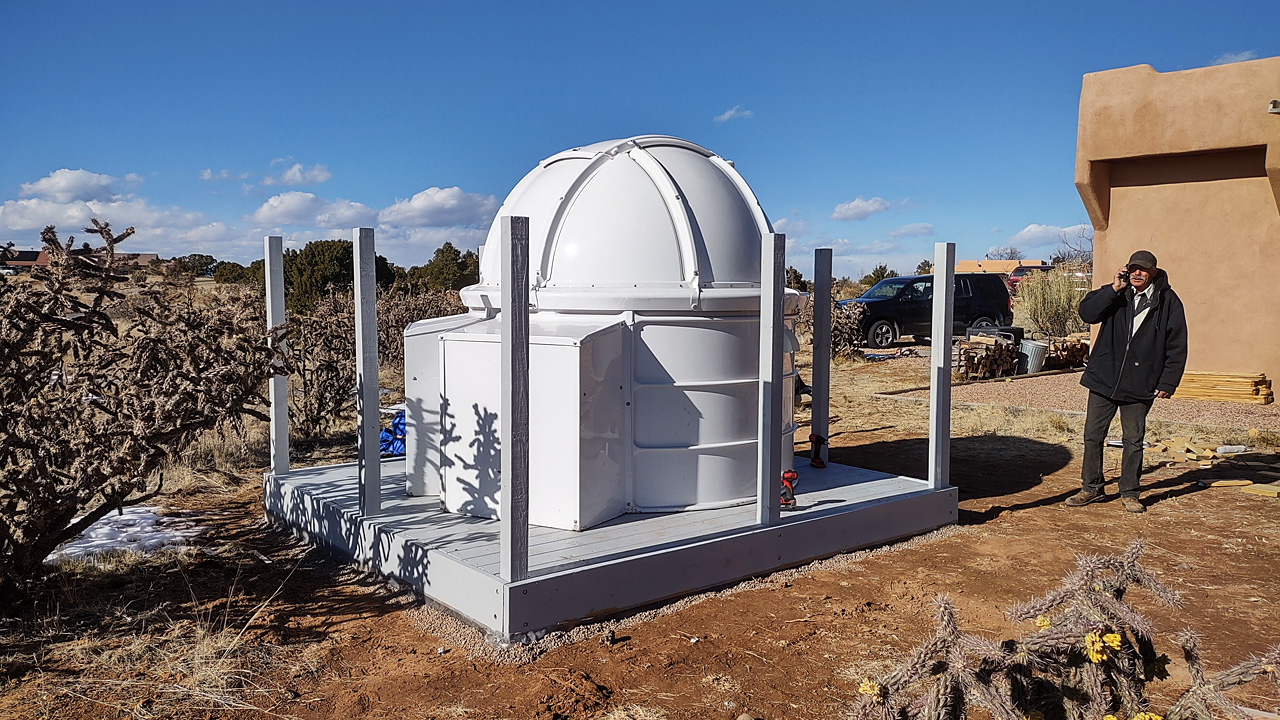
It was then time to place the dome. Although it took 4 people to do it, this wasn’t really as hard as it looks. The lower cylinder was moved in 3 separate pieces, then bolted together. The upper dome part was kept as a single piece, and had to be lifted over the posts. The whole thing had to be jostled around to get it properly centered around the pier and perfectly round so that the dome can turn smoothly. This picture illustrates part of the reason that the pier is not at the center of the deck in the front/back (north/south) direction: There are 2 “bays” that stick out from the cylinder on the south side, making it non-symmetrical.
On the right side of the photo is one of the workers who helped me move the dome. He also helped with the digging and concrete in the first phase of construction, but everything else I did myself.
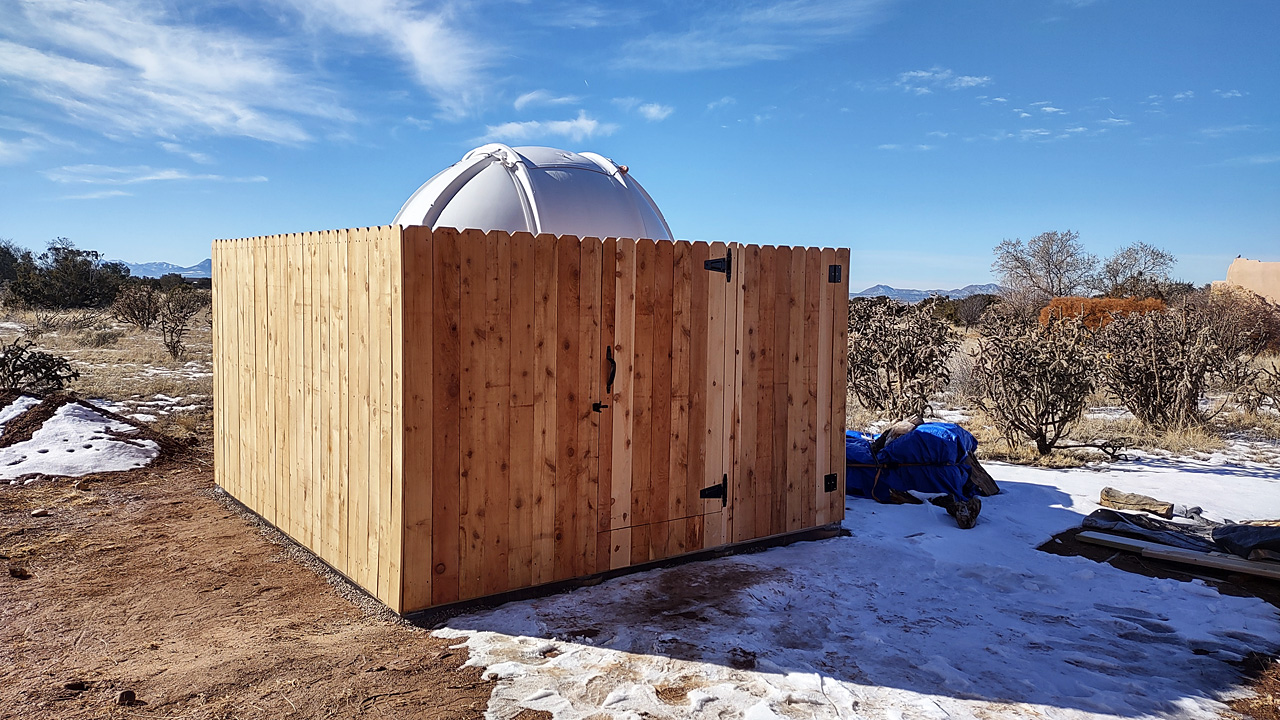
After attaching stringers to the posts I surrounded the whole thing with cedar fence boards. This was required by my HOA, but also adds another layer of security, since the gate in the fence can be locked. As with the deck boards, all of the fence boards are attached with screws. My power tools and I both got a good workout in the process.
You might notice that there are 2 sets of hinges, although only one gate handle and latch are visible. The section of fence on the right does in fact swing open, although you have to open the center gate first to unlock the other “gate”. This 2nd gate was required because of a planning mistake. I intentionally placed the front of the dome about 10 inches back from the edge of the deck because this makes it relatively easy to step up and into the dome through its very low door. But I also wanted to be able to get to either side of the dome from this gate to perform any necessary adjustments to the dome. Unfortunately, with the 4 inch posts on either side of this gate the spacing is too tight for me to squeeze through, so I had to add the second gate to provide access around the dome. One might say that the problem is my “thickness” rather than the “thinness” of the passage, but I prefer my story of bad planning.
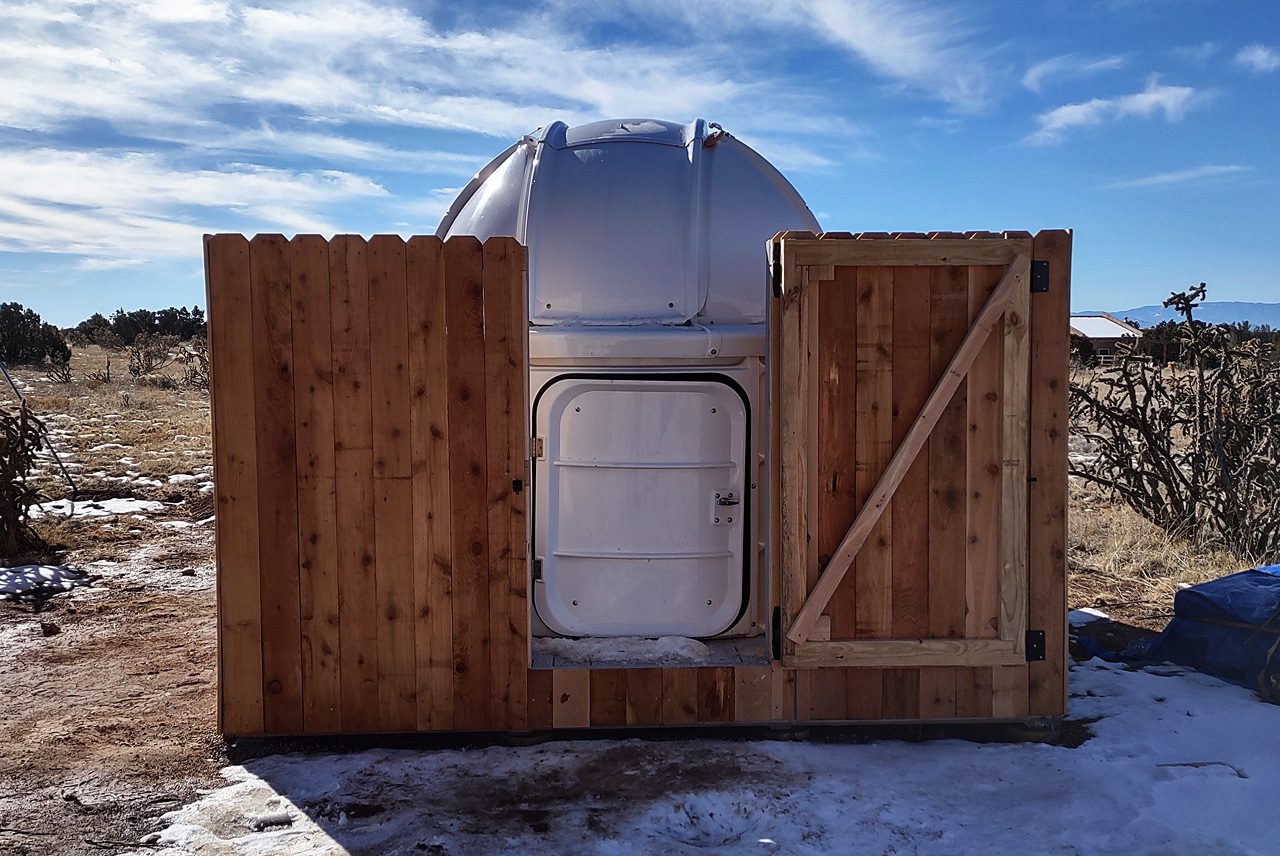
With the gate open you can see the door to the dome directly behind the opening. Notice that there is a mound of ice (thawed and re-frozen snow) right in front of the door. This is unfortunate because it’s going to happen repeatedly, I expect. I may have to install a heating pad there.
The fence and the dome itself need to be painted to match the house (again, an HOA requirement), but that will have to wait for warmer weather. In the interim, I plan to get a cover for the dome that is less objectionable than the bright white color of the dome.
And, of course, I still need to install the mount, telescope, and imaging equipment. Still lots of fun ahead!